A common question for cyclists coming to Japan is: Can you take bikes on the train? The answer is yes! This post and supporting video ‘How to take a bike onto the train in Japan‘ are our handy guides on how to take your bike on the train in Japan.
Índice
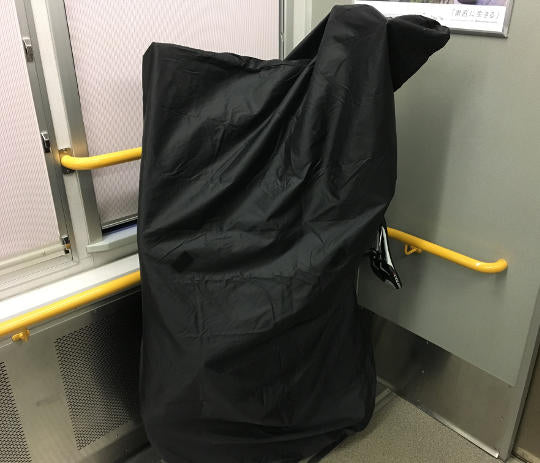
Taking bikes on the train in Japan isn’t as simple as it is for our friends in Europe or North America. To take a bike on the train it needs to be covered completely so essentially it’s just a large bag or a piece of luggage. There is overhead storage on most trains and if you have panniers, a backpack or any other bags, you can free up your hands by putting it above and then trying to get a good spot for your bike.
신칸센(신칸센)
It’s also possible to take your bike in the bag on the Shinkansen but there have been a few recent policy changes from JR regarding oversized luggage and it’s a good idea to check the JR Oversized Luggage reservation page for the latest information.
From our own experience of taking a bike of the bullet train, we have always used the space behind the back row that can be found on every carriage. However, this space must be reserved in advanced so it is recommend that you make a plan ahead to ensure you have a space to stow the bike.
One trick is to try and get on the Shinkansen that is starting from your destination. This means that the people at your station will be the first to board and there is more chance of reserving a rear-seat and snagging some storage space. In Japanese this is called ‘starting destination + hatsu’ so if you are going to Hakata from Osaka, I would ask the staff when the next ‘Shin-Osaka hatsu’ is.
그린카
The Green Car is the higher class car of the Shinkansen. They are more expensive but every seat has a bit more room and there is more chance to reserve a seat as they are more expensive and not always booked out.
The front seats and the rear seats have extra room for storage in the green car so if you have a larger frame and are worried about finding space on the Shinkansen, you can ask if any front or rear seats are available in the green car.
기차 가방
A train bag is a necessity when taking your bike on a train in Japan.
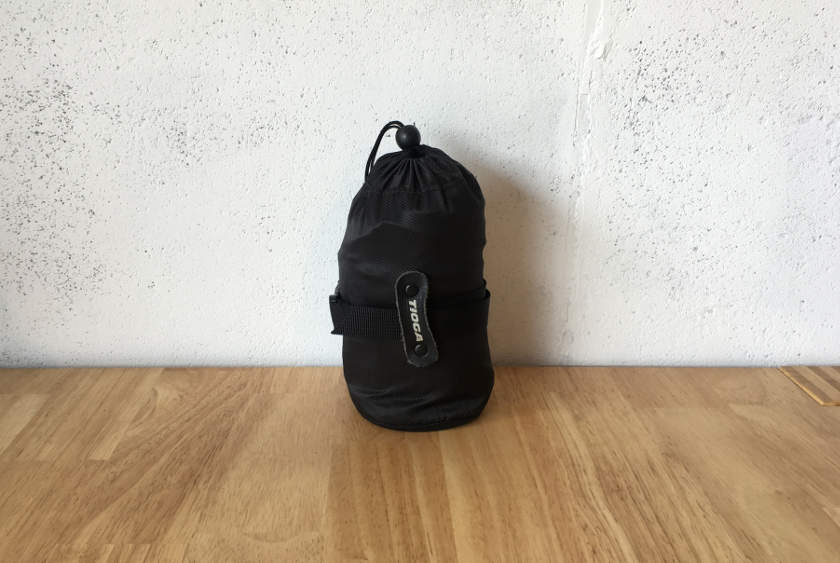
There are a few different kinds of train bags or ‘Rinko bags’. The RBRJ favorite is the Tioga Cocoon bag which we have been using reliably.
The bag rolls up into a small pouch just larger than a water bottle so it’s very compact when not in use.
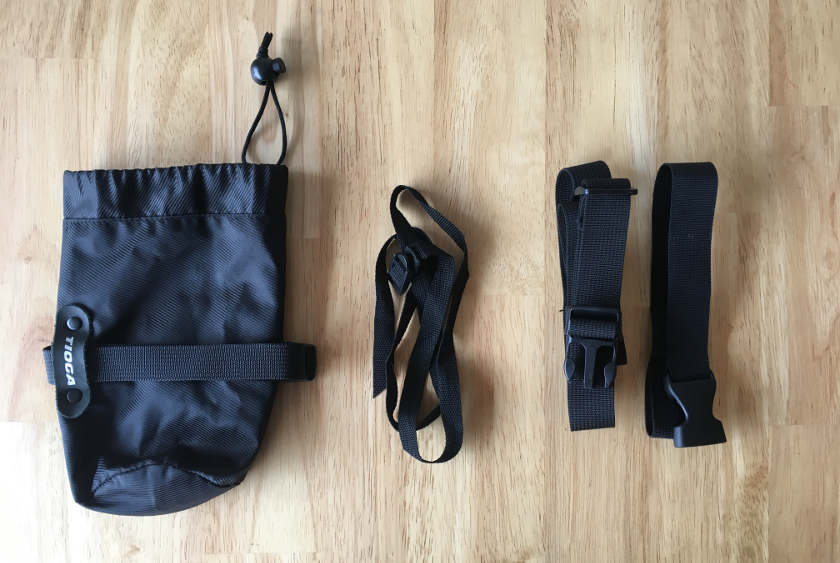
작은 휴대용 가방 안에는 다음이 있습니다.
- 자전거 가방 (블로그 아래 이미지 참조)
- 작은 스트랩(아래 이미지 중간)
- Larger shoulder carry straps (two straps – on right in below image)
Instructions on how to put bike in a train bag
Tiempo necesario: 10 minutos
It only takes a few minutes to get your bike into a rinko bag. Follow the steps below.
- 앞바퀴를 벗고 프레임에 부착
먼저 앞바퀴를 떼고 페달과 크랭크를 체인 스테이와 평행하게 뒤로 향하도록 배치합니다.
Then using three of the smaller straps (there are more in the bag but we find three is enough) fix the front wheel around the frame, crank and chain stay area.You should attach the wheel to the left side of the bike (non drive-train side) and you can just tie the straps in bows.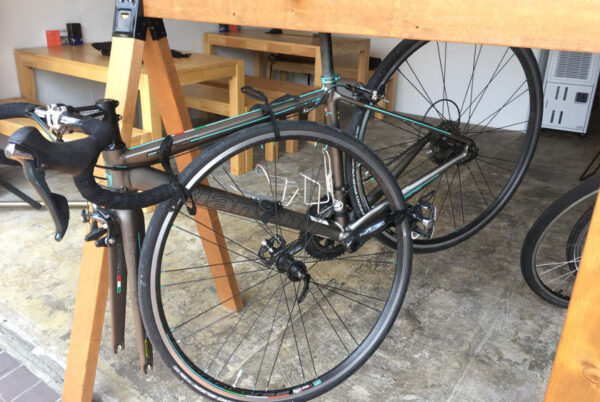
- Prep the bag
먼저 가방의 앞면, 뒷면, 위쪽 및 아래쪽이 무엇인지 확인하십시오. 가방의 뒤쪽은 뒷바퀴가 앉는 곳처럼 둥글다.
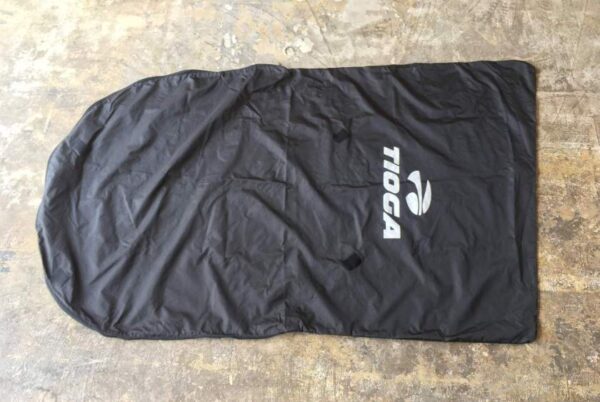
가방 상단에는 핸들바 스템에 스트랩을 걸 수 있는 작은 구멍이 있습니다. 두 지퍼 사이로 시트포스트가 튀어나와 있습니다(지퍼를 올리는 방법은 아래에서 자세히 설명합니다).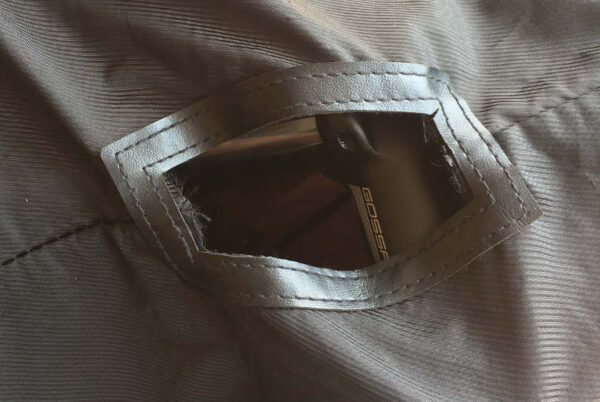
가방은 가방 뒷면에 두 개의 지퍼로 열리고 닫힙니다. 지퍼를 열면 자전거를 가방에 넣을 차례입니다.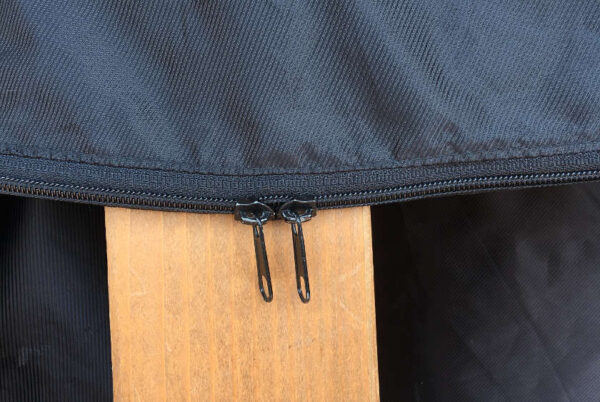
- Put the bike in the bag
자전거를 가방에 넣고 핸들 바를 먼저 넣으십시오. 핸들 바는 가방에 자전거를 더 많이 넣으면 옆으로 회전하지만 약간의 회전이 필요할 수 있습니다.
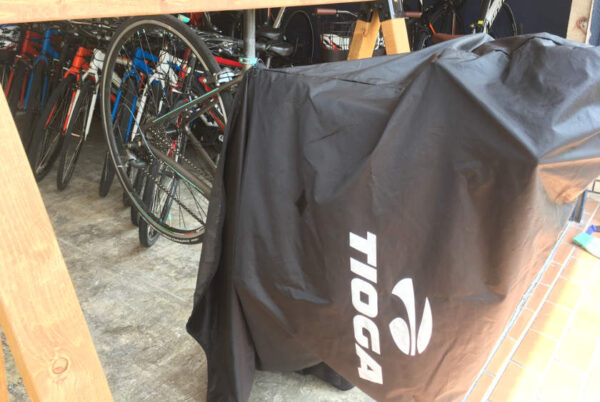
가방을 자전거 위와 주위로 계속 움직일 때 가방을 움직이고 양쪽에서 자전거를 자유롭게 덮을 수 있도록 자전거를 뒷바퀴에 세우는 것이 가장 쉬운 경우가 있을 수 있습니다.
자전거가 가방에 제대로 들어가면 체인 링과 뒷바퀴 주위에 하단 지퍼를 지퍼로 열 수 있습니다.
완료되면 두 지퍼가 시트 포스트의 양쪽에 꼭 맞게 지퍼로 고정됩니다.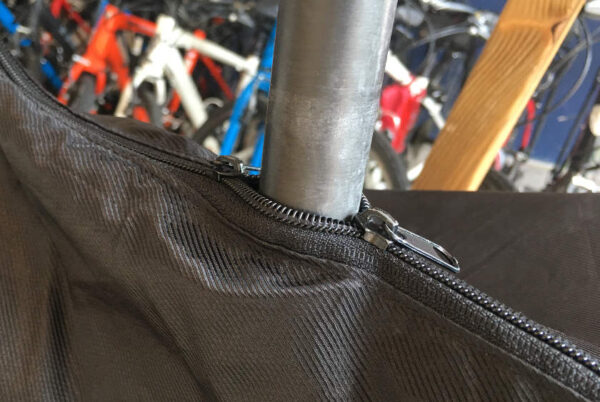
- Using the Shoulder Strap
원하는 경우 어깨 끈을 부착하여 자전거를 어깨에 메고 다닐 수 있습니다. 이것은 손에 패니어나 다른 가방이 가득 차서 자전거를 어깨에 메고 다녀야 할 때 유용합니다.
가방을 들고 있지 않거나 배낭이 있는 경우 어깨끈이 필요하지 않습니다. 저는 보통 한 손으로 자전거를 안장 잡고 다른 손으로 티켓을 개찰구에 넣습니다.
어깨끈을 착용하는 방법은 다음과 같습니다...
시트 포스트의 긴 스트랩과 핸들바 스템의 짧은 스트랩을 사용하십시오.
먼저 더 긴 것을 시트 포스트에 감은 다음 클립 끝을 다른 쪽 끝의 고리에 끼웁니다. 그런 다음 단단히 당길 수 있습니다.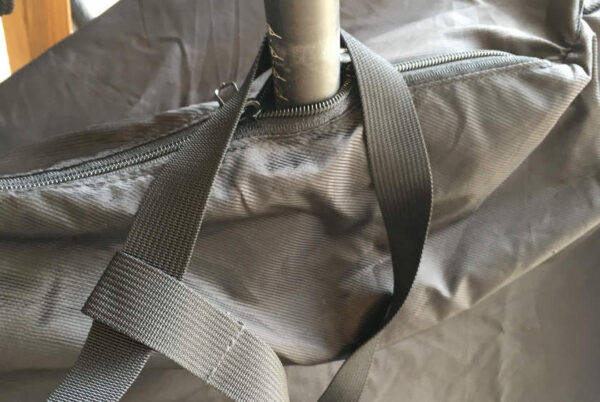
그런 다음 작은 것을 줄기 주위에 감고 클립 끝을 다른 쪽 끝의 고리에 끼 웁니다. 단단히 당깁니다.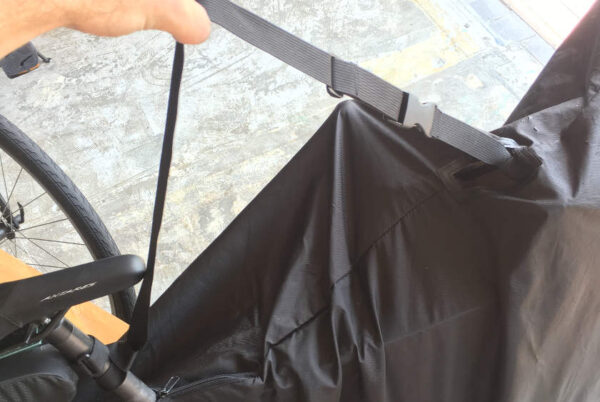
클립을 부착하면 어깨 끈이 있습니다. - 시트 포스트와 안장에 대한 참고 사항
According to some rules, JR does sometimes state in documents that the seat and seat post must also be covered and not sticking out.
However, from our experience of getting the train, we’ve never been asked to cover the seat when using the train bags.
If by chance staff asks you to cover the seat, simply zip the two zippers above the seat so it’s all covered. Depending on the size of your frame and the height of your seat, you might need to lower the seat a little so be sure to keep your multi-tool within reach just in case.
그게 다야, 이제 자전거로 기차를 탈 준비가 되었습니다.
추가 포인터
역무원 코 아래에 가방을 넣지 마십시오.
자전거는 보통 개찰구 근처 부스에 앉아 있는 역무원의 눈에 띄지 않게 포장하는 것이 좋습니다.
지붕이 있는 열차에 자전거를 가지고 타는 것은 허용되지만, 너무 많은 주의를 끌거나 민폐를 끼치지 않는 것이 좋습니다.
일본 역은 바쁠 수 있으며 역 직원의 궁극적 인 목표는 최소한의 소란으로 열차가 정시에 운행되도록하는 것입니다. 따라서 역 한가운데에 흩어져 있거나 개찰구 앞에서 더 나빠지면 사람들의 방해가되어 직원의 우려 나 질문을 불러 일으킬 수 있습니다.
나는 개찰구에서 조금 떨어진 곳에서 짐을 싸서 준비하고 티켓을 일찍 받으면 과정이 훨씬 순조롭게 진행됩니다. 그런 다음 준비가되면 게이트로 걸어 가서 통과하여 플랫폼으로 향하십시오.
피크 시간 피하기
시간에 유연하게 대처할 수 있다면 러시아워를 피하고 자전거를 내려놓을 수 있는 공간을 조금 더 즐기십시오. 바쁜 시간에 기차를 타야하는 경우, 자전거와 다른 가방을위한 공간이 조금 더 있으므로 조직하고 객차 끝에서 탑승하십시오.
Reflexiones finales
린코 백은 일본 외딴 지역에서 멋진 사이클링 모험의 문을 여는 열쇠가 될 수 있습니다.
기차가 바쁠 때나 자전거와 가방을 들고 역을 지나 다른 플랫폼까지 긴 산책을 해야 할 때가 있지만, 바람을 머리카락에 대고 자전거로 돌아올 때 기분이 어떨지 생각해 보세요.
